A few days ago, a user commented below the post shared on facebook, asking for a guide about how to add a fade-in effect to the background.
So we made this tutorial for you.
We broke the tutorial into three parts. You can skip any of them if you knew it.
How to add a video transition effect between two clips?
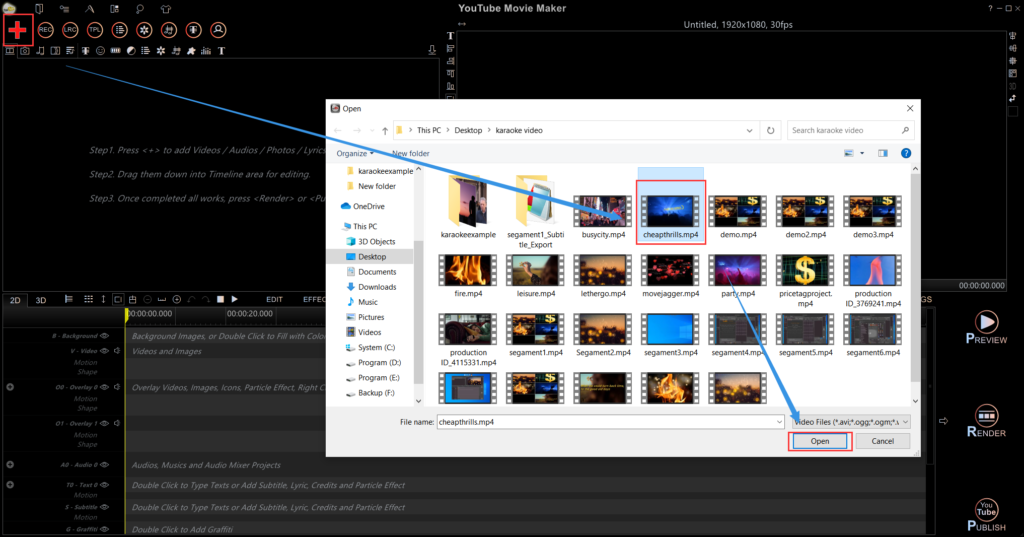
Step 1: Run your “YouTubeMovieMaker” > “Make YouTube Videos”. And then, add clips.
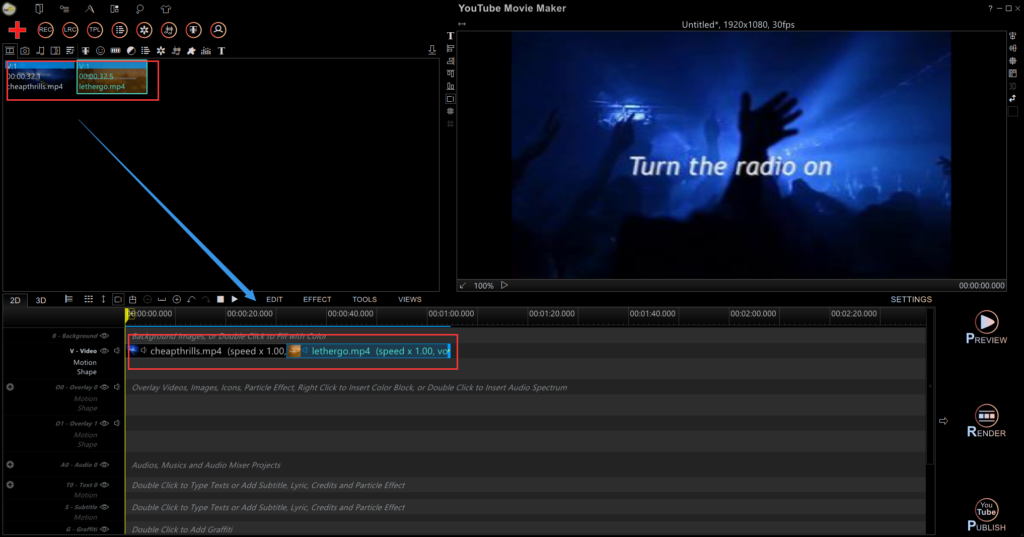
Step 2: Drag the clips to the Video Line.
Step 3: Click “Transition Effect” and choose one to drag it to the clip you want to add a transition effect.

How to add a fade-in effect to the first video clip?
If you want to add a fade-in effect to the first clip, there are two ways can help you make it.
Step 1: One of the easiest ways is to right-click the first clip, and then click “Insert a Gap” in the right-click bar.
Step 2: Move the gap to the beginning.

Step 3: Right-click the gap to add “Transition Effect” > “Add Transition Effect”.
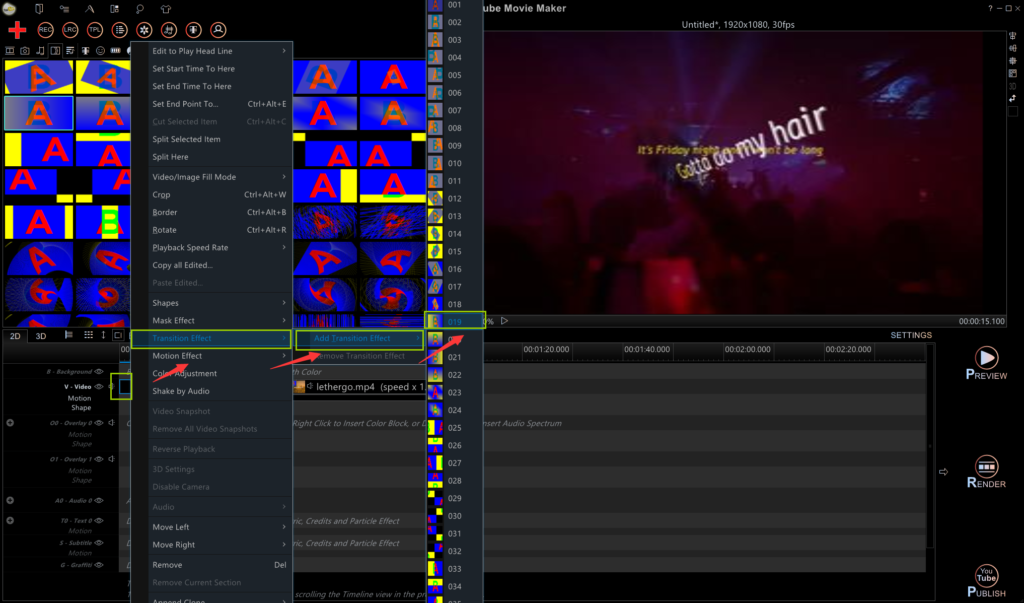
Or drag the fade-in effect from the source bin directly.
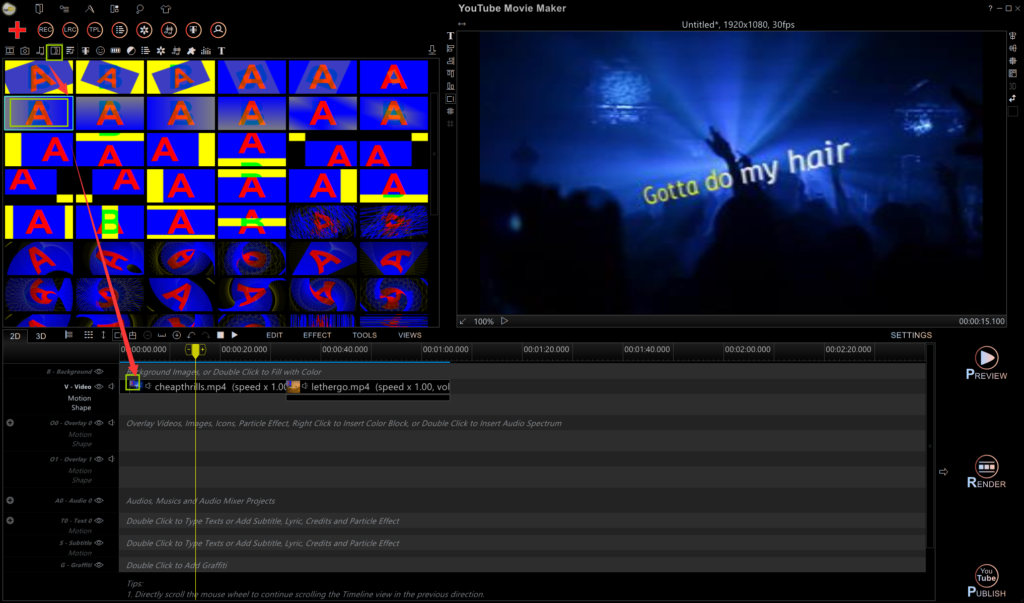
Of course, you can left/right move the arrow on the gap to adjust the duration of the fade-in effect.

The second way:
Step 1: Right-click the clip and then click “Motion Effect” > “Add a Motion Effect”.

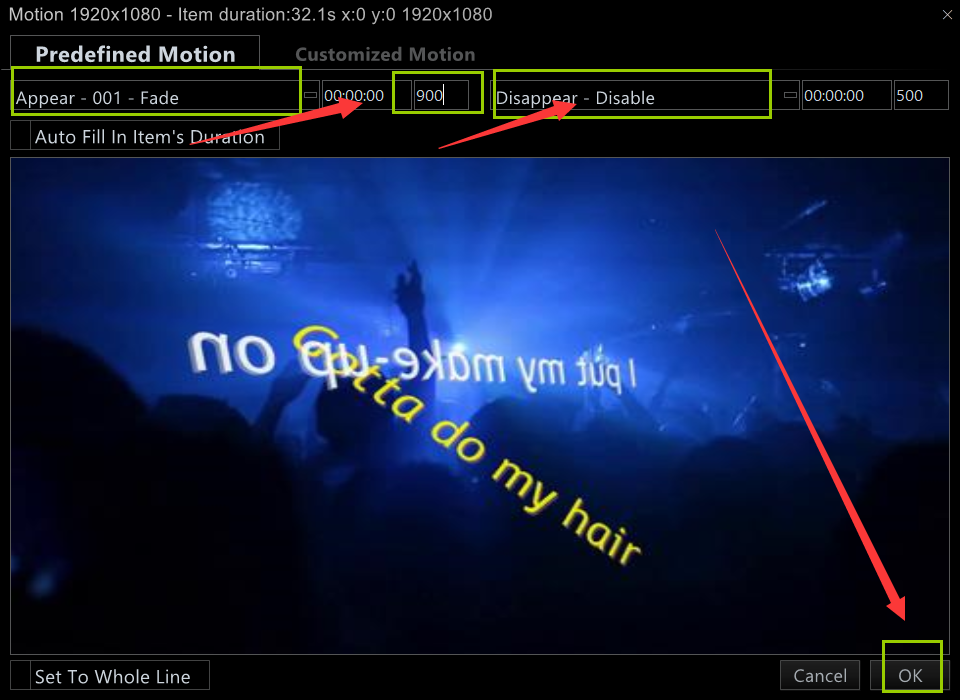
You’ll see a pop-out window like this.
Step 2: Choose “Fade” as the appear effect and set its duration.
If you don’t need a disappear effect, you can set it as “Disable”.
That’s all for adding a cool transition effect to clips now.
How to add a fade-in effect to the video background?
Step 1: Right-click the Background Line to find “Insert Color Block”, adding a color background.
Or you can directly add an image as a background.

Step 2: Right-click the background to “Insert a Gap”.


Step 3: Move it to the front of the background.

Step 4: Repeat the steps of part 1. But remember to add the transition effect to the gap.
If you have any other questions about how to edit videos on YouTube Movie Maker, Comment or email us , please. Find it useful? How about sharing it with your friends and someone in need?


